Beignets de feuilles

IMG_20150531_174805
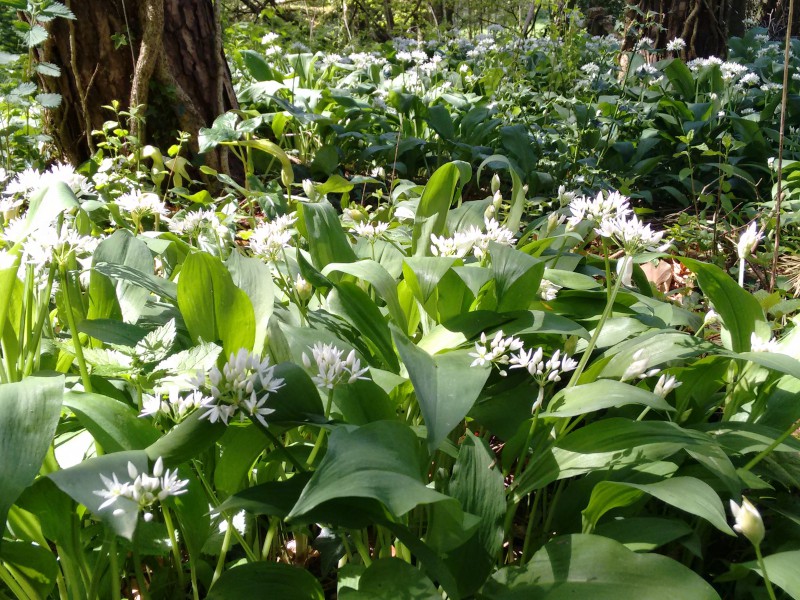
This is a very quick post for a very quick and easy canapé dish that showcases the abundant crop of green salad leaves and delicate herbs flourishing at this time of year.  Here in Dorset, we have wild rocket, basil, chives, mint, peashoots, wild garlic and sage in the garden and the local woods, so I have been making the most of them.

Recipes for beignets are common to all my provençal cookery books be they recent publications or older, more traditional recipe collections.   Most of the recipes I have consulted involve frying a single piece of vegetable such as courgette or aubergine, but we need not limit ourselves here.  A myriad of ingredients lend themselves to battering it seems.  I’ve come across recipes featuring anchovies, salt cod, potatoes and courgette flowers (see my chickpea flour version of the latter here) and let’s not get sidetracked right now by sweet beignets…..

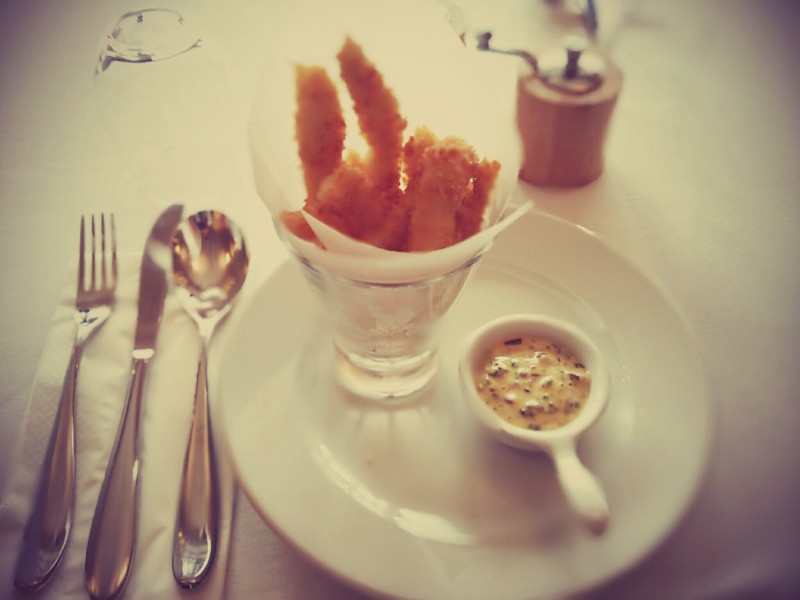
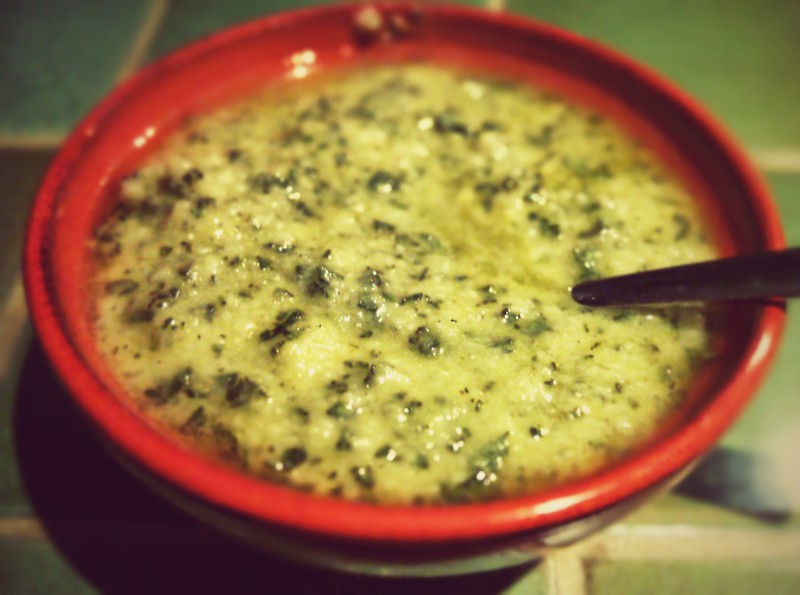
Eggs are almost always used in the batter mix but the simple recipe below uses just ’00’ pasta flour and sparkling water to bind the chopped herbs and leaves.  These herby fritters are packed with spring flavour and the simplicity of the batter makes them light and not too filling.  Serve them hot, just out of the pan with a glass of rosé (Tavel worked for us) or fizz.  A little aïoli, pesto or fresh tomato sauce on the side as a dip is always popular too.

I used rocket, basil, chives and a little sage for my beignets this time but you can use whatever you have to hand or what’s available locally.  Spinach and chard work well with some flavoursome herbs to accompany them in the mix.

Beignets de feuilles (makes 16)

30g rocket leaves
A handful of basil leaves
A handful of chives
6 large sage leaves
100g 00 flour
150ml sparkling water
A good pinch of salt
Groundnut or sunflower oil for frying

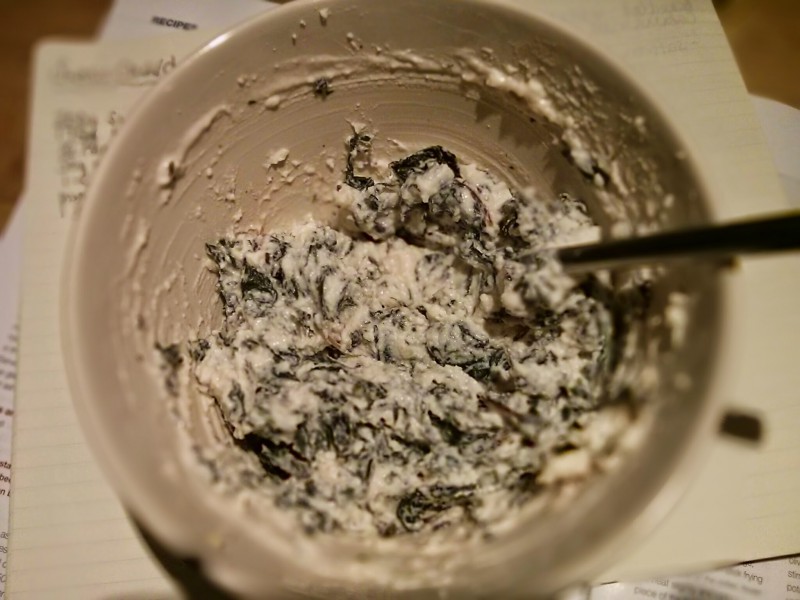
Rinse the leaves, pat them dry and then roughly chop them.

Whisk together the flour, sparkling water and salt, then add the leaves to the batter and mix thorougly.

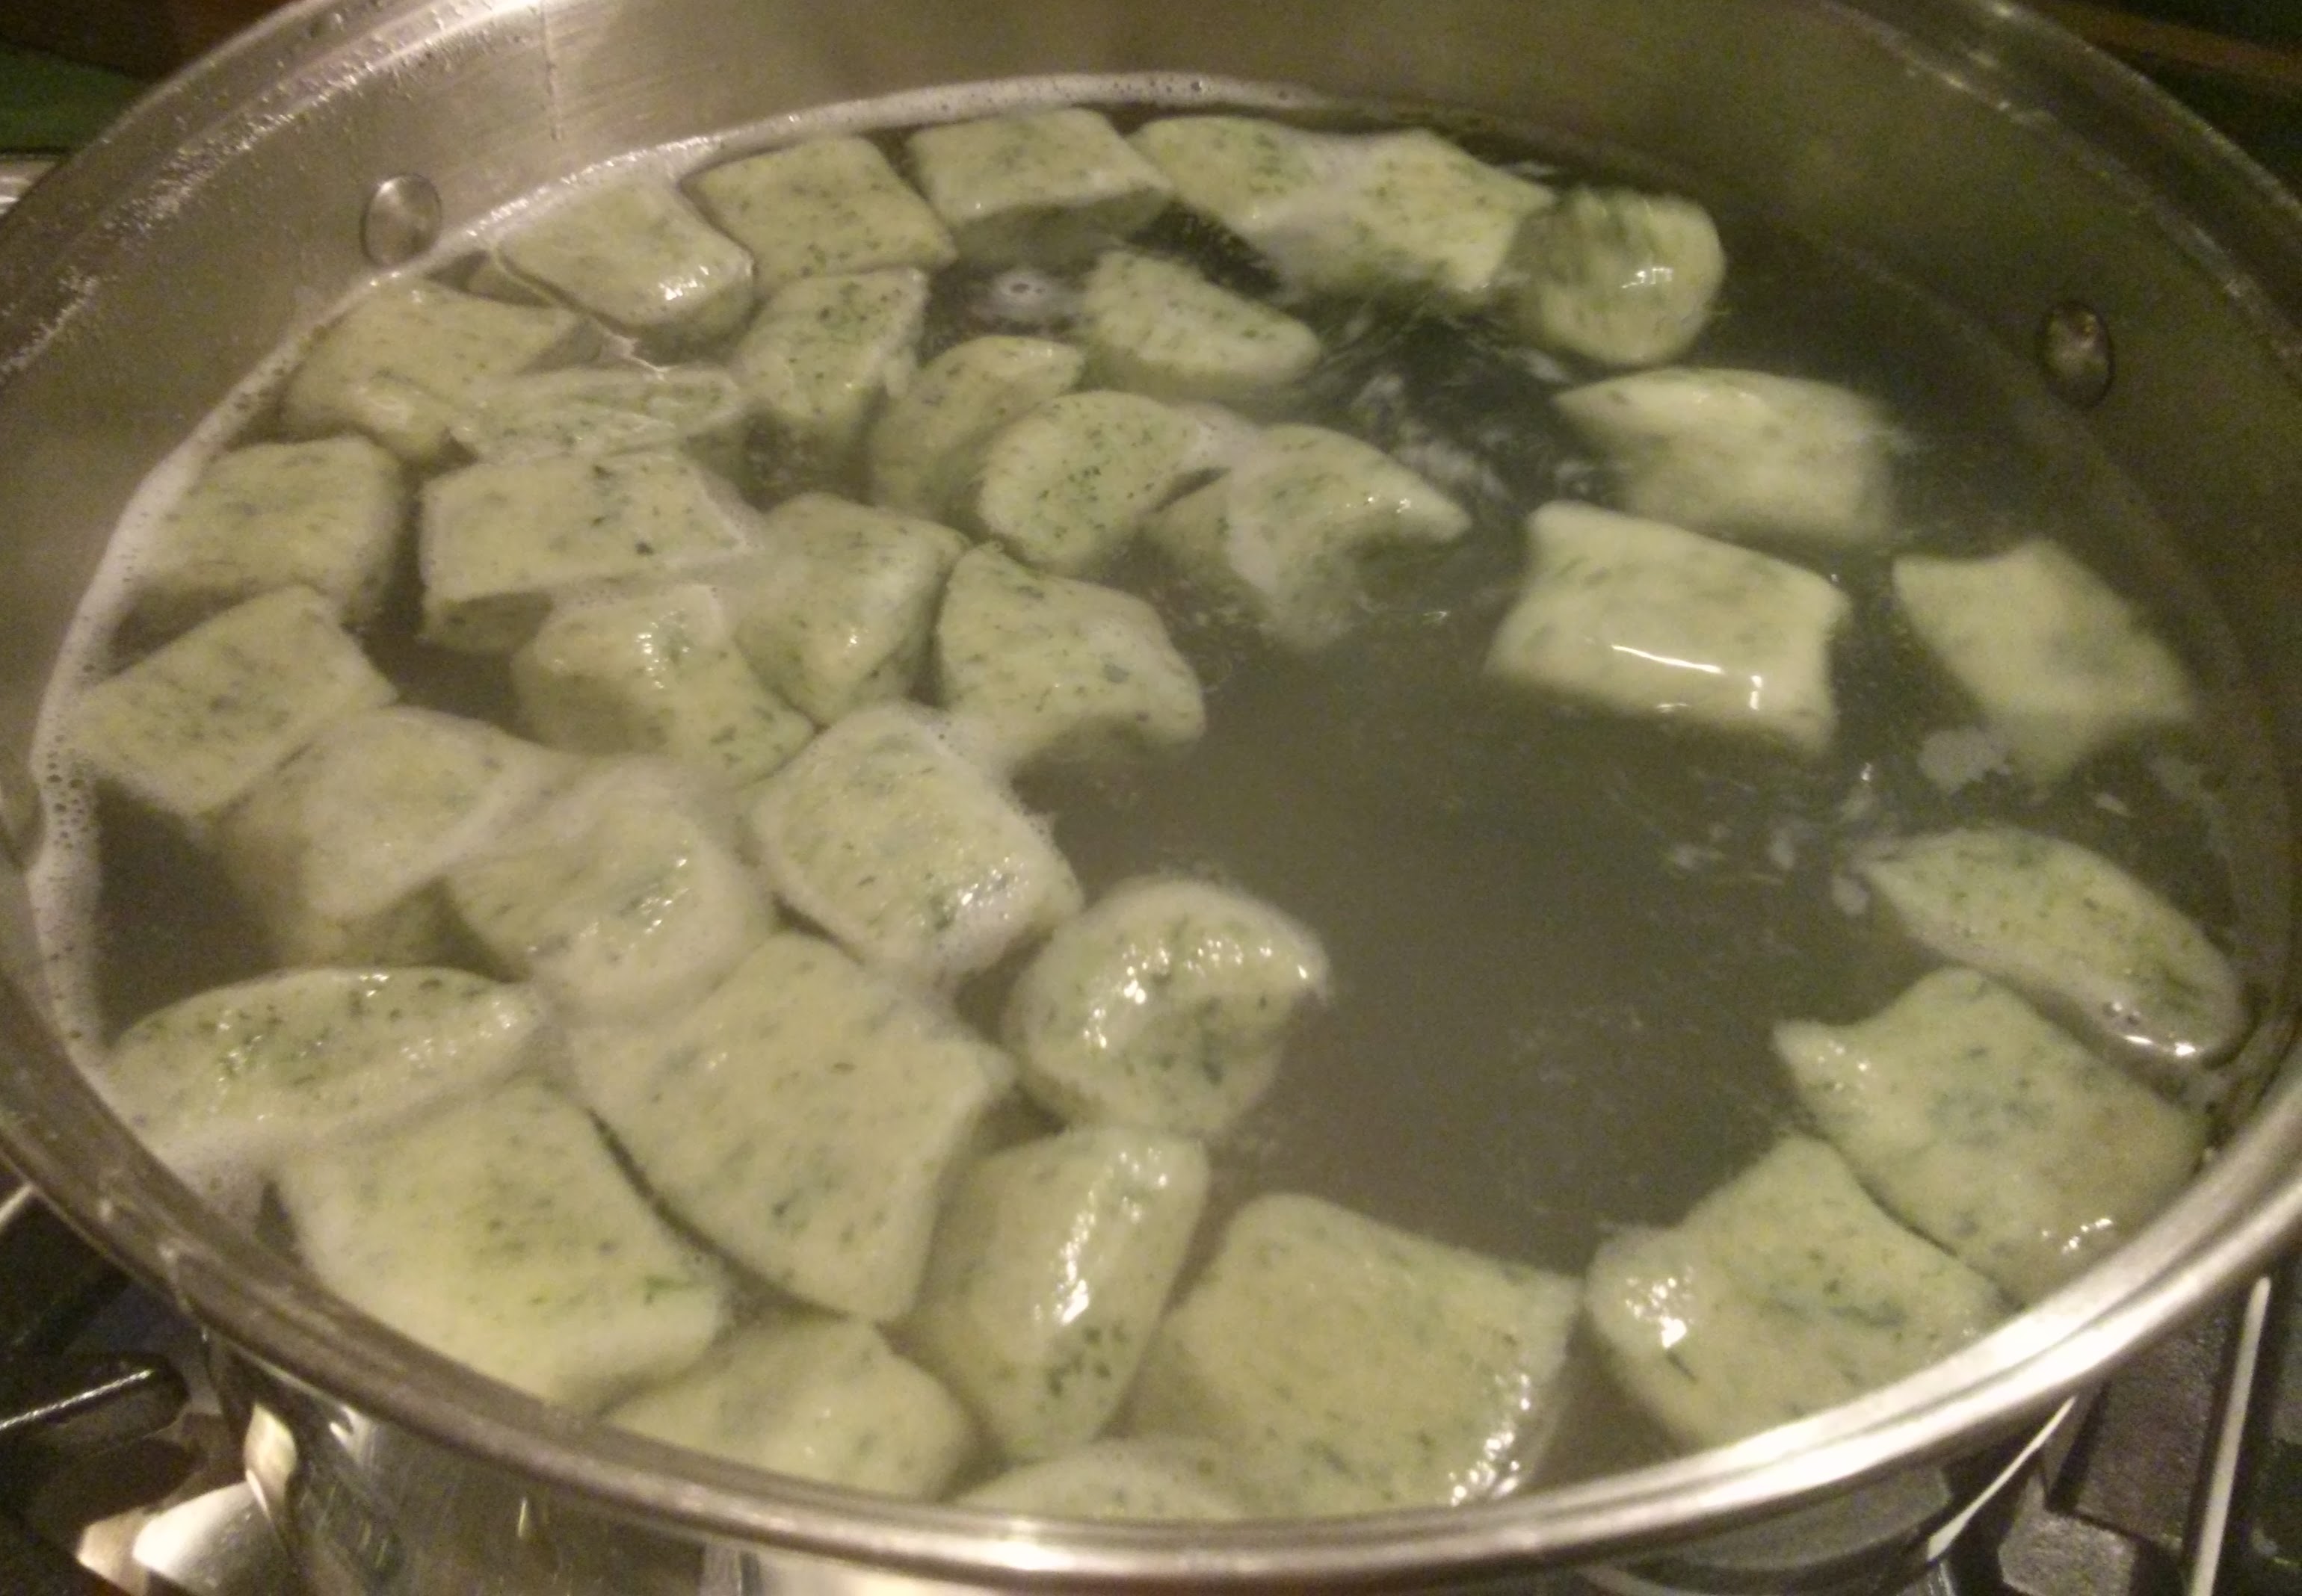
Heat the oil in a deep frying pan and, once it is hot, add a teaspoon-sized, test ball of the batter.  If the batter mix sizzles nicely, you know the oil is ready. Gradually add desertspoon-sized portions of batter, but don’t overcrowd the pan – four to five at a time works well.  Turn the fritters in the oil until they are crisp all over and lightly browned. The kitchen will be filled with the aromas of the various herbs by this stage – my family came running from all ends of the house and garden!   Drain the fritters on kitchen towel and serve immediately with your choice of dip.

IMG_20150531_175934 (1)

IMG_20150504_121941

IMG_20150504_121501

IMG_20150504_120559

IMG_20150504_120956

Barba Juan / Barbagiuai or fried ‘ravioli’

IMG_20150406_203943Barba Juan, or Barbagiuai if you’re over in Liguria translates as ‘Uncle John’ and the relevance of the name for this delicious, local dish remains a mystery for most.  In his book ‘Flavours of the Riviera’, Colman Andrews offers one or two possible explanations, and the one that seems most plausible is that in Nice years ago the term barbajouan meant simpleton.  Whilst Barba Juan was indeed a simple dish incorporating produce available locally, this is perhaps not the most satisfying term to use to describe it.

So what is Barba Juan?  It’s often described as fried ravioli though most recipes use a much heavier dough mix than is typical for pasta.  Small pockets of a pastry-like dough were stuffed with vegetables and cheese, with the addition of rice and ham being quite common too.  These little pouches of tastiness were then shallow-fried in olive oil.  The result is more like an English vegetable pasty than anything to do with ravioli, in my opinion, and the author of ‘The Cuisine of the Sun’, Mireille Johnston, has them down as pastry turnovers.

The pastry is usually made from flour, olive oil and a little egg, adding water where necessary to form a smooth dough.  I was intrigued, however, by a recipe from the province of Savona in Liguria which suggested using the local Vermentino wine to bind the dough and I have given details in the recipe below (it works!), but you could use water instead.

In the winter months, the main vegetable used for the filling would be some form of squash (which I favoured for my experiments with the recipe), whilst in spring and summer, chard or spinach were more common ingredients (that will follow – watch this space……).  Jacques Médecin, writing in ‘Cuisine Niçoise’, informs us that this latter, summertime version should be called boussotou.

Barba Juan are not difficult to make – the dough is easy.  As a canapé, they’re perfect! We munched happily on our ‘pasties’ on the terrace on a sunny, early Spring evening with a glass of Rolle bien sûr!

Barba Juan / Barbagiuai

350g butternut squash, chopped into large chunks and roasted in a little olive oil
200g ricotta
1 egg, beaten
40g grated parmesan
A small handful of chopped oregano
200g plain flour
40ml olive oil
Dry white wine or water to bind the dough

Mix together the filling ingredients – squash, ricotta, egg, parmesan and oregano – using a food mixer or a hand-held masher.  Keep cool in the fridge.

In a bowl, bind the plain flour and olive oil then add wine or water until you have a smooth, heavy dough.  Leave the dough to rest in the fridge, wrapped in film, for an hour or two.

When you are ready, roll the pastry out to 2mm thick and cut with a round pastry cutter that is 7cm in diameter.   This will make canapé-sized turnovers but you could make larger ones to serve as a starter or for a picnic lunch.

Place a teaspoon of filling on each circle of pastry, brush the edges with a little water and seal.

Fill a large frying pan with olive oil to a depth of 3cm and heat it up until hot.  Add a few pasties at a time and turn them over part way during cooking, ensuring that they are beautifully browned on either side.  Serve as soon as possible.

IMG_20150405_190556

IMG_20150406_093340

IMG_20150406_115232543

IMG_20150406_123118


Six weeks at Ashburton Cookery School

IMG_20150122_170729~3For some time now, I have been blogging about food and wine, and whilst I have worked for ten years in the wine trade, my cookery skills are purely homespun.   So for six weeks during January and February, I commuted backwards and forwards from Dorset to Ashburton Cookery School in Devon with the aim of learning how to cook properly.  And what an eyeopener that was.

Week One, Day One: Embarking on the six-week professional culinary certificate with thirteen other students back in mid-January, I was staggered by the amount of dishes the programme suggested we would get through and it’s fair to say that each day was full-on.  Before we were let loose in the kitchen however, we took a course of sessions on food safety, culminating in a level 3 Food Safety for Supervisors examination.

Week One, Day Five: The tutor chefs at Ashburton have all worked in top positions in acclaimed restaurants all over the UK.  I came to love their professional yet relaxed teaching styles, their humour and their incredible patience.  Day One in the kitchen was something of a shock to the system – fast-paced with organisational skills heavily emphasised, but the tone was set and we knew what to expect as the course progressed.  I went home at the end of that day and spent half the weekend chopping carrots, chives and fingers in a desperate attempt to improve my knife skills.

IMG_20150220_225242~2IMG_20150209_142046

Week Two, Day One: Suddenly things really kicked off with meat butchery swiftly followed during the week by fish filleting (both flat fish and round fish).  Each day in the kitchen included demos by the chefs and the opportunity to go away and try the dishes for ourselves at very well-equipped kitchen stations with two tutor chefs giving advice and constructive criticism as we worked. Ingredients are sourced locally wherever possible and so we used some of the best produce Devon has to offer.  In the back of our minds for much of the time were the three four-hour, practical examinations due in Week 6 during which we would be assessed against the level 2 professional culinary certificate standards.  But there was loads of encouragement and a whole host of tips from the chefs for getting through this process successfully.

Week Three, Day Five:  On Fridays, a couple of hours were devoted to theory.  Sessions included lamb, beef, pork and vegetable cuts, pastry, game cookery and would conclude with an overall review of the techniques covered during the week.  This was a useful exercise for me. It rounded off the week helping me to firm up on what I’d learned, and some very useful handouts were provided, particularly on meat butchery, fish filleting and preparing sauces.

IMG_20150129_132604~2IMG_20150203_132738

Week Four, Day One: As someone who loves the food of Provence and Liguria, I was very keen to try the recipes from those areas – pasta, focaccia, risotto and pesto were all on the agenda, and the pesto exercise found me suffering a severe case of pestle and mortar envy.  That’s my next birthday present sorted then.  Husband: take note. The overall course programme was very broad however, with a balanced mix of classic and regional dishes, baked goods and desserts.

My fellow participants included chefs working on yachts, a lawyer, another HR professional like me, and students looking to start their own food-related businesses or enter the restaurant trade.   The challenge for the tutors, given that some of us had no experience in a professional kitchen and others had plenty, must have been huge.   But it worked and by the end of the course the group was really gelling and some firm friendships were formed for the future.

Week Six, Day Four: After the three practical examinations which were held over three days, we each had a tutorial with the assessing chefs where we were given our exam results (I passed, you’ll be relieved to hear), with feedback and constructive comments on our overall performance during the course.   We were also asked if we would like advice on our chosen next steps in the food industry and I found the positive encouragement from this session invaluable.

IMG_20150217_152309IMG_20150206_135908

Week Six, Day Five:  Our last day was hilarious.  We took part in a team canapé challenge and cooked some delicious Indian dishes.  There was plenty of laughter and everyone was clearly relaxed after the ‘trauma’ of the assessments earlier in the week.  Proceedings were rounded off with an awards ceremony where we received our certificates and the all-important Ashburton Cookery School medal.  I shall wear it with pride!

It’s been very strange not making that trip down to Devon this week.  The six weeks flew by but I had got quite into the routine of it and enjoyed the daily chats and swapping of notes with some of the lovely people I met on the course.   I look forward to hearing where they go with their new skills in all corners of the globe.  Finally, a very big thank you must go to everyone at Ashburton Cookery School for making my six-week stay there so enjoyable and rewarding.  And if you are thinking about taking a cookery course, be it professionally or for leisure purposes, I recommend you check out Ashburton’s ‘Ten Reasons to Choose Us’ on their website.

IMG_20150227_154400~2

The four-day daube (de boeuf)

IMG_20141211_173915~2 January seems the perfect time of year for a hearty beef casserole, a warming, bold dish full of protein and lower on fat than much of the standard Christmas fayre, unless you incorporate lard into your recipe as Jacques Médecin does in his book Cuisine Niçoise.  With just  a handful of lardons to add that extra bit of flavour to my daube, I set out on the two, three even four day process involved in getting the most from this dish, and as usual debated with myself on the following dilemma:  with or without olives, tomatoes or none?  Given that we are in January, the answer right now is a sound no to both, but a Daube Niçoise will usually include these ingredients whilst a Daube Provençale from further west would often omit them, going for orange rind and more herbs instead.

Now in case you’re wondering why I suggest that it could take up to four days to reap the rewards of good daube, here is my thinking:

Day One – prepare the marinade for the beef (carrots, onion, celery, orange zest, garlic, herbs, red wine), and leave it to sit in a cool place overnight.

Day Two – retrieve the beef from the marinade and cook the daube according to the recipe instructions.  The cooking process is long and slow – you can never overcook a daube we are told in Colman Andrews’ Flavours of the Riviera.  You can eat the daube on Day Two should you wish, but rest assured that if you leave it until Day Three the flavours will have developed still further.

Day Three – eat the daube.  If you have followed the above advice, you will have sufficient leftovers for Day Four, or for another day as they freeze well.

Day Four – make pasta and use the leftover daube as a stuffing for ravioli.  Top with grated parmesan.  A post on ravioli-making will follow soon.

Go with red wines to match these two dishes.  For the daube, a Coteaux d’Aix or a village Rhône like Gigondas or Vacqueyras.  With the addition of pasta and grated parmesan to finish, the ravioli is fun with a Corsican sangiovese-a-like red or a Bellet.

Daube de Boeuf
Serves 4 with leftovers for ravioli

For the marinade (Day One):

1kg chunks of stewing beef
1 large red onion, chopped
1 large carrot, chopped
1 large stick of celery, chopped
Peeled zest of a small orange
2 garlic cloves, crushed
2 bay leaves
A handful of fresh curly-leaved parsley, chopped
A few sprigs of thyme
2 cloves
75cl (one standard bottle) of red wine
A teaspoon of sea salt and a few twists of the black pepper mill

Place the dry marinade ingredients in a large bowl.  Add the beef and pour over the red wine.  Mix well and cover. Place in the fridge or a very cool place and leave overnight.

IMG_20141207_095208

IMG_20141207_095434To cook the Daube (Day Two):

The marinade ingredients
2 tbsps olive oil
200g bacon lardons
1 red onion, chopped

In the morning or when you are ready to cook, lift the meat out of the marinade.  Strain the liquid from the solid ingredients and reserve both.  Dry the beef pieces on kitchen towel.

In a large frying pan with a lid, fry the lardons until crispy.  Remove from the pan and set aside.  Gently fry the chopped red onion in the lardon fat until soft. Set the onion aside with the lardons.  Add the olive oil to the pan and sauté the beef chunks in batches, a third at a time, until browned on all sides.  Set the beef aside.

Tip the solid marinade ingredients into the pan and heat briefly in any remaining olive oil until they start to sizzle.  Add the red onion, lardons and beef and cook for a further five minutes, stirring regularly.  Tip in the marinade liquid and add boiling water if necessary to cover all the ingredients.  Stir to mix everything and then cook very gently, with the lid on the pan, for three to four hours.  Stir occasionally and add more wine if the daube gets too thick. Taste and season with salt and pepper as required.

The daube will be fine to eat at this stage but you could leave it to cool and refrigerate it until the next day.

To reheat the Daube (Day Three):

Remove the daube from the fridge and skim off any fat sitting on the top of it.  Reheat carefully over a very low heat until cooked through.

Serve with gnocchi or spinach pasta tossed in butter and parsley.

Ravioli (Day Four): To be continued…….

Mini olive & onion muffins (gluten free)

IMG_20141128_192737~2 (1)

I’ve written about chickpea flour before.  On the Côte d’Azur and over in Liguria it’s the common ingredient for delicious pancakes cooked in large, flat copper pans. Topped only with black pepper in Nice where it’s called socca, Ligurians often add herbs or thinly sliced onions to their farinata.

A pancake made with chickpea flour is something altogether different from one made with white flour.   The chickpea flour which is also known as gram, besan and garbanzo bean flour, gives a nutty flavour and a much denser texture, making the pancake more filling and tastier (in my opinion), plus it has the added benefit of being gluten free.  Given such advantages, this kitchen has witnessed a few experiments with chickpea flour this year, some more successful than others, but my latest creation was a triumph and I judge this by the enthusiasm shown for it by my husband and children.  They act as excellent barometers of what works and what doesn’t, so the recipe for mini olive and onion muffins is below.   The mixture makes about 30 canapé-sized mouthfuls and feel free to add finely grated parmesan to the batter should you wish.  These easy-to-make morsels would be perfect over the holiday season with a glass of fizz or a fresh, dry white.

Mini olive & onion muffins
You will need a mini muffin tin for this recipe.

200g chickpea flour
3 eggs
175ml greek yogurt
60g black olives, pitted and finely chopped
1 small onion, finely chopped
50g parmesan cheese, finely grated (optional)
A good pinch of salt

Set the oven to 200°C.

Sauté the chopped onion in olive oil until soft.  Leave to cool.

Beat the eggs, add the yogurt to them and mix until combined.  Sieve the chickpea flour into the mixture to lessen the likelihood of a lumpy batter. To this batter add the cooled onion, the olives, salt and cheese (if using).  Give the whole lot a really good stir.

Using a pastry brush, grease a mini muffin tin with olive oil.  Pop it in the warmed oven for a minute or so to warm up the oil, then take it out and distribute the muffin mix evenly so that the mixture in each recess is level with the top of the tin.

Bake in the oven for approximately 15 minutes or until the muffins are browned on top and slightly risen.   Do watch them though as oven temperatures can vary.

Pop the muffins out of the tin and eat straight away while still hot.

IMG_20141128_181835~2

IMG_20141128_191755~3

In pursuit of pan bagnat

IMG_20140818_085046

For friends of ours who also lived in the area some years ago, any visit back to Nice involves a search for the perfect pan bagnat, and until this most basic of food cravings is satisfied, no trip is complete.  Inspired by their enthusiasm, we have become fans too and were lucky enough to have double helpings during our last stay. It’s always fun to see how each ban bagnat varies slightly from the next.

You may have already seen a photo of the pan bagnat we found at La Fougasserie in Nice this summer, but our base on this trip was Roquebrune Cap Martin and on my morning strolls down to the popular Boulangerie Rey & Fils I endured several mouthwatering encounters with their freshly-made, stuffed rolls which would stare out at me from behind the counter.  But I was only there for a breakfast baguette and so, morning after morning, I resisted temptation, and if you check out the photo at the top of this post you will see how difficult this was.  Towards the end of the week, however, I found proper, unfilled pan bagnat rolls for sale in Monaco – large ones and this is important because there’s a lot of filling to pile into one of these sandwiches.  With the perfectly designed, beautiful rolls appearing before me unexpectedly, I gave in.  It was time for the DIY pan bagnat.

So what is this irresistible speciality?   Its literal meaning is soaked bread, and years ago it was a salad using the same vegetables and fish we see in today’s ‘sandwich’.  Back then torn pieces of stale bread were thrown into the salad and they would soak up the olive oil, vinegar and the juice from the tomatoes.  Nowadays things have perhaps become more convenient and the aforementioned ‘croutons’ have been replaced by white bread rolls into which the same salad and fish mixture is stuffed.  Essentially pan bagnat is salade niçoise in a roll.  The fundamental fillings include tuna and/or anchovies, sliced tomatoes, black olives, sliced hardboiled eggs, and a variety of other ingredients according to who you believe: radishes, green peppers, spring or regular onions, broad beans, tender baby artichokes, gem lettuce, cucumber and basil all get a mention in someone’s pan bagnat.  The whole mixture is bound together with a generous slug of extra virgin olive oil and a splash of vinegar.

We enjoyed our ‘homemade’ pan bagnat sitting out on the terrace with a view straight across the bay to Monaco, a glass of chilled provençal rosé proving to be a happy pairing.  Back here in the UK, it’s virtually impossible to find bread rolls of the right dimension so I’ve experimented with making my own – see below for details.  Some recipes talk about hollowing out the roll and weighting down the stuffed sandwich for two or three hours.  Do try it if you have the willpower.  I, unfortunately, do not.  Choose your own fillings from the long list already mentioned.  In lieu of pitted black olives which have a tendency to fall out of the roll while you’re eating it, I like to whizz up a handful of them with a little olive oil to make a spread for one side of the roll. And do add a squeeze of lemon juice if you dare.  I like to but traditionalists will tell you it is not the done thing.

IMG_20141115_120806


IMG_20141115_124742Pan Bagnat Rolls

500g strong bread flour
15g dried yeast
5g salt
50ml olive oil
280ml warm water

Add the liquid to the dried ingredients and mix either in a food mixer with a dough hook or by hand.  Follow mixer instructions or kneed by hand for up to 10 minutes until you have a soft dough that’s not sticky.  Form into a ball, place in a large, oiled bowl and cover with a cloth.  Leave to stand in the kitchen, away from draughts, for an hour or until the dough has at least doubled in size.

When the dough has risen, cut it into four equal parts.  Form into round bread roll shapes and, with a sharp knife, score in the typical pan bagnat criss-crossed style as shown in the photos above.  Flour two baking trays and place two rolls on each – make sure they are well spread out on the tray as they will expand further.  Leave again, covered, for another hour.  After half an hour, pre-heat your oven to 220°C.

After an hour, the rolls should have risen considerably.  Sprinkle them with flour and place them in the oven.  Bake for 12 minutes or until nicely browned on the top.  Cool, assemble and enjoy…..

AllAboutFranceBadge

Pasta sauce: swiss chard and two cheeses

IMG_20141031_200804 (1) In the city of Nice, swiss chard has long been a kitchen staple and its beautiful, green, sometimes pink-stemmed leaves are known in France as blettes.  Both here and over the border in Liguria, greens of all descriptions are used extensively in tarts, soups, tians and for colouring homemade pasta and gnocchi.  On the tart front, the curiously sweet niçois dish Tourte de Blettes, which features apples, raisins and swiss chard baked in a pastry case with sugar, is a traditional and popular dessert, while the savoury and seasonal Torta Pasqualina (Easter Tart) of Liguria combines swiss chard with ricotta or the local prescinsêua cheese as a base for the tart’s filling.

This latter dish has inspired a few pasta sauce experiments recently and if, like me, you struggle to entice your children to ‘eat their greens’, this recipe could well be for you – mine lapped it up.  I kid you not!  And with some pecorino and a scattering of toasted pine nuts to finish, it’s sophisticated enough for the grown-ups too – think primi piatti and follow it up with a special piece of fish or meat for the second course.  If you can’t get hold of swiss chard, spinach works just as well and the pasta of choice is the cylindrical sort – macaroni, rigatoni or penne would be ideal.

Pasta sauce: swiss chard and two cheeses
Serves four as a starter

200g swiss chard, stalks removed
175g fresh ricotta cheese
10 large basil leaves, finely chopped
50g pecorino romano, finely grated
1 clove garlic, crushed
A pinch of salt
30ml milk
200g macaroni, penne or rigatoni
A handful of toasted pinenuts

Place the swiss chard in a pan with a lid and pour in enough cold water to cover the bottom of the pan.  Put the lid on and heat the greens on a medium heat, stirring from time to time.  After five minutes or so, the greens will have wilted. Drain them in a sieve, and once cooled, squeeze out any remaining liquid.

Cook the pasta according to the packet instructions.

Combine the ricotta, basil leaves, garlic, salt and 40g of the pecorino in a bowl then stir in the cooked, drained swiss chard.  Pour in the milk and mix again.

Once the pasta is cooked, drain it reserving a little of the cooking water.  Put the pasta back into the saucepan and stir in swiss chard and cheese mixture.  Add a little of the pasta water (perhaps two large spoonfuls) to give a consistency to the sauce that you are happy with.  It should coat the pasta nicely but not be too thick.

Serve the pasta in bowls and top with the remaining pecorino and the toasted pinenuts.  Watch in amazement as people lap up their greens!

IMG_20141031_181715

IMG_20141031_192853

La Fougasserie, Nice

IMG_20140819_124848 (2)

A cousin of the Ligurian focaccia, which is also known as fugassa over there, fougasse is a provençal loaf easily recognised by the slashes cut through it prior to baking.   Back in August, after a mooch round the beautiful Cours Saleya food and flower market in Vieux Nice, we went in search of a bakery I had heard good things about whose name called out to me – La Fougasserie.   Heading off down the rue de la Poissonnerie, a narrow, old town alley just off the market square, we found bread heaven at No. 5.  It was approaching lunchtime as we arrived and the olive fougasse which I had really set my heart on had sold out, but no matter.  There were still ample stocks of plain fougasse with a tempting range of other breads and sweet treats.  And don’t get me started on the pan bagnat!  Business, unsurprisingly, was brisk at La Fougasserie.

IMG_20140819_125041 (1)

IMG_20140819_204838

As much as we enjoyed the plain fougasse, and we did hugely, the craving for olive fougasse just wouldn’t subside so back home in the UK I had a go myself.  What I love most about fougasse is that it’s common to add all sorts of delicious, chopped-up extras to the dough.  Olives and herbs are perhaps seen most widely, but sundried tomatoes, ham and cheese work well too.  In my recipe, I’ve grated a little gruyère cheese and folded it into the dough with the olives, and this seems to make for another of those ‘don’t blink or it’ll all be gone’ snacks that won’t hang around for long in my house.  With that in mind, you’ll be relieved to know that this bread is great for part-baking, freezing and bringing out another day for the final bake.  All the details are below.

Olive and Gruyère Fougasse

Makes two loaves

A note on flour types: You can use strong white bread flour although experiments using 00 pasta flour have been pretty successful too.  To make a more rustic loaf I have mixed stoneground spelt flour with white bread flour (half and half) for a slightly heavier texture.

500g flour of your choice
12g dried yeast
5g salt
50ml extra virgin olive oil
280ml warm water
100g gruyere cheese (or parmesan), grated
Two large handful of black olives, roughly chopped

In a bowl (or a food mixer with a dough hook) combine the flour, yeast, salt, olive oil and water.  Knead the dough for ten minutes until it is smooth, elastic and non-sticky.  If using a mixer, follow the machine’s instructions for making bread dough.  Place the dough  in an oiled bowl covered with a cloth and leave it in the kitchen for an hour to prove by which time it should have doubled in size.

Put the dough on a lightly floured surface or board and cut it in half.  Roll each dough out to around 20cm by 15cm and sprinkle each one with half of the chopped black olives, but leave a few to decorate the top of the loaves.  Press the olives into the dough.  Fold a third of the dough over into the middle and then fold in the other third to cover it so that all the olives are contained within the dough.  Roll out again to 20cm by 15cm and repeat the same procedure for the cheese, using all of it this time as none is required for decoration.

Roll each piece of dough out to approximately 30cm to 20cm but try to taper the top end of the loaves so that one end is thinner than the other in the typical fougasse style – see the photos below.

Slash the loaves down the middle and in smaller diagonal cuts fanning out from the centre – again see the photos below.  You should cut right through the dough when making these incisions.

Stud the dough with the remaining chopped olives and place each loaf on a floured baking tray, cover with a cloth and leave to prove for a further 30 minutes.  Turn the oven on to the maximum setting – 220°C.

Uncover the loaves, sprinkle them with flour and bake, one at a time, in the oven for 15 minutes or until lightly browned on the top.  Reduce the baking time to 8 minutes if you plan to freeze the loaves, allow them to cool then place in the freezer in plastic freezer bags.  Cook from frozen at 200°C for 10-12 minutes.

Enjoy! In our house, we love to cut slices of the bread and dip them in a bowl of extra virgin olive oil – provençal of course!

IMG_20141018_172545

IMG_20141018_182230

And Pistou?

IMG_20141009_214332It never ceases to amaze me how most people know exactly what pesto is yet when you mention the term pistou, it’s blank faces all round.  This no-nut French cousin of pesto is just as delicious and even easier to make.  No toasting of pine nuts required here.

So, as pistou forms one half of my blog’s title, I thought it was about time we did it justice and featured its many attributes in a post dedicated to this most provençal of accompaniments.  Commonly associated with the dish soupe au pistou, a hearty, chunky vegetable soup which will feature on this page soon, pistou uses basil as its flavouring as does the classic pesto, but there tends to be more cheese and garlic than you would see in the Italian version.  Just as recipes for pesto nowadays use all manner of herbs and nuts, I’ve gone for a sage pistou here as it’s a great match with autumnal courges (squash) many varieties of which seem to be on display everywhere I look right now. If you want to stick with basil for your pistou, just use twice as much as I’ve quoted for the sage in the recipe.

IMG_20140916_175816

Regardless of your choice of herb, pistou comes with a warning: it is very garlicky, so use a little less than I’ve recommended if you’re anxious about it.  Traditionally made in a pestle and mortar, this recipe works just as well in the blender and frankly I suspect you are more likely to try this quicker method at home.  As with pesto, pistou is to be added to hot soups and pasta and should never be cooked on its own.

The sage pistou is a great match for the green gnocchi in my last post and would be lovely drizzled over just-out-of-the-oven, roasted autumnal vegetables.  Or why not stir a generous spoonful into a homemade pumpkin or squash soup? Not quite soupe au pistou but warming and satisfying all the same.

IMG_20141015_192051 (5)

Sage Pistou

10g sage leaves, torn roughly
15g garlic, crushed
50g parmesan, finely grated
100ml extra virgin olive oil
A pinch of salt

Place all the ingredients in a blender and whizz for a few seconds until everything is combined.  Taste and add more salt if necessary.

The sauce will keep for a couple of days in the fridge or longer if you cover it with a thin layer of extra virgin olive oil.

Les Gnocchis Verts (green gnocchi)

IMG_20140308_194338La Merda dé Can is the niçois name for these gorgeous, green gnocchi made with swiss chard or spinach.  The literal English translation of the term will not be repeated here as it’s less than flattering, but I am sure you can work it out for yourself.  Now, soggy gnocchi equal stodgy gnocchi so experiments have been many in our house – my family is very patient – in the pursuit of a foolproof recipe for the light, elegant parcels I have many a time seen for sale in Vieux Nice.

The principal ingredient is potatoes and they should be the floury variety. Boiling them in water, the traditional way, adds moisture of course and they need then to be dried out.  A lot.  No amount of sitting the cooked potatoes on a bed of salt, as some recipes suggest, does the job quite as well (for me) as baking the potatoes in their jackets.  Not conventional, I hear you scream but it works every time.  And anyway, this blog is about investigating and not simply regurgitating old recipes.

To dress the just cooked gnocchi, just scatter some grated parmesan and add a drizzle of your best extra virgin olive oil.  It’s traditional to serve them with the juices from a beef daube in winter or, in summer, with a fresh tomato sauce. If you’ve time to whip up a pesto or pistou to top these beautiful pillows of fluffiness so much the better, and a white wine from the Luberon, as an accompaniment, will finish things off to a tee.

IMG_20141012_153243

Les Gnocchis Verts

3 large floury potatoes weighing approximately 1kg
200g swiss chard or spinach
350g all purpose flour
1 large egg, beaten
A good pinch of salt

Wash and dry the potatoes, prick the skins and place in a preheated oven at 200°C.  Bake until the skins are crisp and you can stick a fork into them easily.  This should take about an hour.

Wash the chard or spinach and remove any thick stalks.  Place the leaves in a saucepan and add cold water, not to cover the greens completely but just enough to cook/steam them.  Put the lid on and bring to the boil on a medium high heat, watching them regularly to ensure the water doesn’t boil dry.  Once the greens have wilted, which will take 5 minutes or so, remove them from the heat and drain in a sieve.  Leave to cool.  Then squeeze the moisture out of the greens and set aside.

Once the potatoes are ready, take them out of the oven and leave them to cool a little before scooping out the flesh and mashing it.  Allow to cool a little more before mixing all the ingredients together to form a soft dough.

Sprinkle a dusting of plain flour onto a chopping board and shape small handfuls of the dough into long, thin rolls about the thickness of your thumb. Cut the rolls into 3cm cylinders and leave to dry for half an hour or so, covered with a clean tea towel.

To cook the gnocchi, bring a large saucepan of water to the boil, add the salt and drop them into the water.  When they rise to the top, they are ready.  This takes two to three minutes.  Drain the gnocchi and serve immediately with your choice of delicious adornment!

Unused gnocchi dough can be kept quite happily in the fridge, wrapped in film, for a couple of days, but do give them a good dusting of flour when you roll them out as they can become a little sticky.

IMG_20140308_205935 (1)